

To get that perfect crunch and deep golden color, the must-have essentials for better deep frying are: oils with a high smoke point, accurate temperature control using a good thermometer, heavy-bottomed cookware that holds heat well, and the right tools for handling moisture and draining food.
It might look like you’re just “dropping food into hot oil,” but real deep-frying skill comes from using proper equipment and knowing how heat works. Without these basics, you risk greasy food, uneven cooking, or even serious kitchen accidents.
Deep frying often has a bad reputation for being messy or hard, but with a bit of setup, it can become one of the most satisfying cooking methods at home. To really get good at it, learning your deep frying essentials is the first step to getting that golden-brown finish that can match or beat restaurant results.
By paying attention to your tools and the simple science behind frying, you can turn a normal weeknight meal into something special.
Contents
- 1 Why Proper Preparation Improves Deep Frying Results
- 2 Essential Equipment Every Kitchen Needs
- 3 Choosing the Best Oil for Deep Frying
- 4 Preparation Techniques for Consistent Deep Frying
- 5 Managing Temperature for Crispier, Evenly Cooked Food
- 6 Key Tips for Better Flavor and Texture
- 7 Safety Practices to Prevent Accidents and Burns
Why Proper Preparation Improves Deep Frying Results
What Are the Key Benefits of Using the Right Deep Frying Tools?
Using the right tools is about control, not just comfort. With a sturdy, heavy pot and an accurate thermometer, you remove the guesswork that causes soggy or burnt food. Good equipment helps the oil stay at a steady temperature, which creates a layer of steam around the food. That steam layer keeps the oil from soaking in, giving you a crisp outside and a juicy inside.
Special tools like spider skimmers and wire racks also boost safety and make work easier. Trying to grab delicate tempura with a dinner fork is frustrating and can lead to burns. When you buy proper tools, you can focus on timing and technique instead of fighting with the wrong utensils that might ruin the dish.
What Are Common Mistakes When Deep Frying at Home?
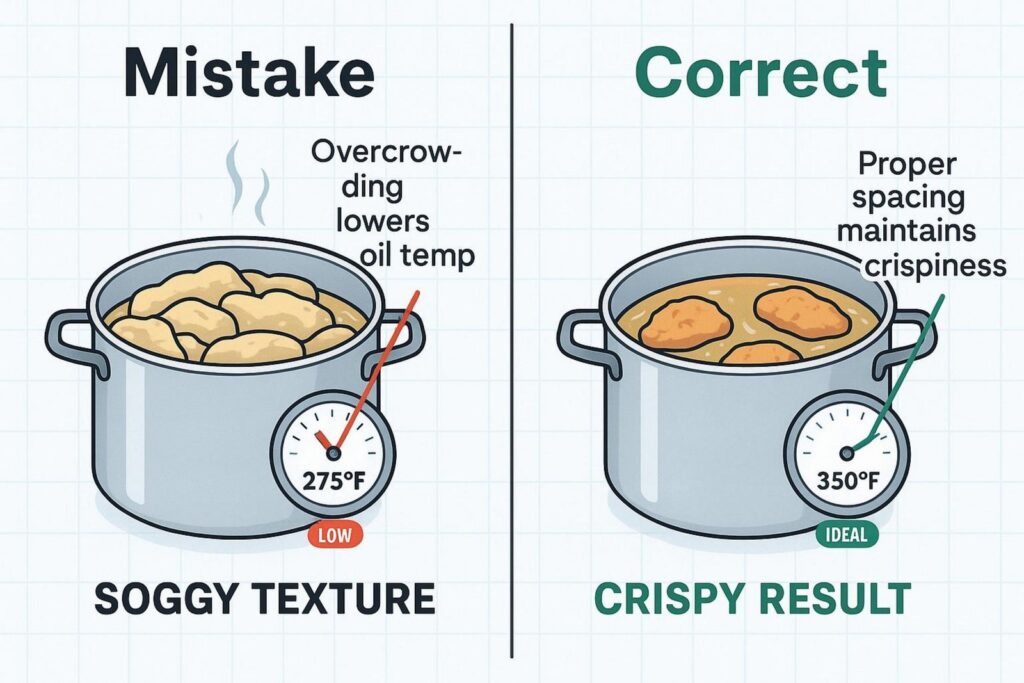
One of the biggest mistakes home cooks make is guessing the oil temperature. Without a thermometer, you can’t tell if the oil is 300°F or 375°F just by sight. If the oil is too cool, food sits and soaks up fat like a sponge. If it’s too hot, the outside burns before the inside cooks through. This lack of accuracy is why many home-fried foods turn out heavy and unpleasant.
Another frequent mistake is not drying the food well before frying. Water and hot oil do not mix; even a little moisture can cause violent splattering or boil-overs. Many beginners also put too much food in the pot at once. Overcrowding makes the oil temperature drop fast, leading to greasy food and uneven browning.
How Does Preparation Affect Texture, Flavor, and Safety?
Preparation sets up the Maillard reaction-the chemical change that creates the brown color and deep flavor of fried food. When your ingredients are at the right temperature and properly coated, this reaction happens faster and better. A well-made batter or breading acts like a shield, trapping the natural juices inside while forming a crisp, satisfying crust.
For safety, preparation is the first line of defense. Clear your workspace, keep a lid nearby to smother flames if needed, and never fill the pot with oil more than halfway. These steps should be done before you even turn on the stove. A calm, tidy setup cuts down on rushed mistakes, which cause many deep-frying accidents.
Essential Equipment Every Kitchen Needs
Heavy-Bottomed Pots vs. Electric Deep Fryers: What Should You Use?
The choice between a regular pot and an electric deep fryer mainly depends on how often and how much you fry. A heavy-bottomed pot, like a cast-iron Dutch oven, is loved by many because it holds heat very well. Thick walls soak up and keep heat, so the oil temperature doesn’t crash when you add cold food. This steady heat is key for getting even results over several batches.
Electric deep fryers, by contrast, have built-in thermostats and special heating elements. They’re great for people who fry a lot and want a more hands-off setup. But they can take up space and are often harder to clean than a simple pot.
For most home cooks, a good Dutch oven is more flexible, since it also works for stews, bread, and braises when you’re not frying.
Why a Thermometer Makes a Difference
If you buy only one deep-frying tool, choose a thermometer. A clip-on candy or deep-fry thermometer lets you watch the oil temperature constantly without holding anything over the steam. This steady feedback is key because oil temperature changes as you cook. You need to know when the oil is back up to heat between batches.
An instant-read digital thermometer is also a helpful backup. It lets you check the internal temperature of the food, making sure chicken or fish reaches a safe and tender point. If you just trust how the crust looks, you can easily end up with a nice color on the outside and raw food in the middle.
What Are the Must-Have Tools for Handling and Draining Food?
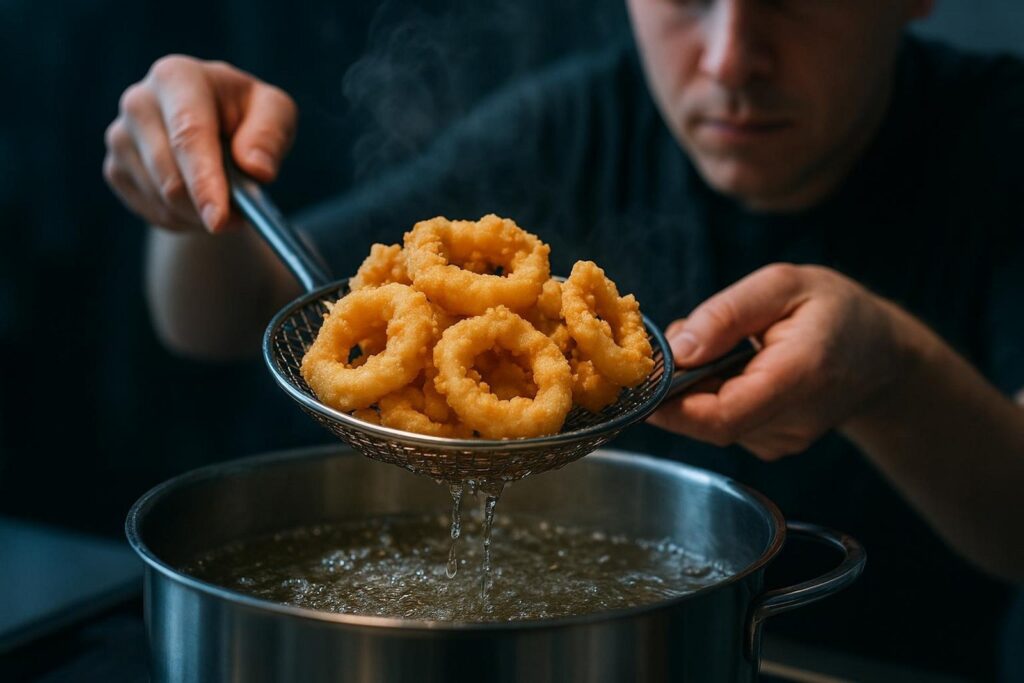
Handling food in 350°F oil calls for tools that give you both reach and control. A spider skimmer-a wide, wire-mesh basket on a long handle-is ideal. It lets you lift many pieces or fragile items without carrying a lot of extra oil. Its open mesh lets oil drip back into the pot right away, which works better than a solid slotted spoon.
Long-handled tongs are also key for turning larger pieces like chicken thighs or doughnuts. Choose tongs that grip firmly but gently so they don’t rip off the breading or batter. Have these tools set out and within easy reach before you start. That way you’re not scrambling to find something while your food sits too long in the oil.
Are Wire Racks or Paper Towels Better for Draining?
Many people grew up seeing fried food drained on piles of paper towels. Professionals, though, mostly use wire cooling racks over a baking sheet. The reason is simple: air flow. When hot fried food rests on a flat surface like paper towels, steam gets trapped underneath. That trapped moisture quickly softens the crisp crust.
A wire rack lets air move all around the food so steam can escape, keeping the bottom as crunchy as the top. If you want to use paper towels, place them under the rack to catch drips, but keep the food itself raised. This small change greatly extends how long your food stays crisp.
Why Good Tongs and Sieves Improve Safety
Staying safe during deep frying is mostly about keeping your hands and body away from splattering oil. Long-handled tongs let you gently lower food into the oil while your arm stays farther back. Dropping food in from high above is a common mistake that causes burns; proper tools encourage the safer method of laying food into the oil.
Fine-mesh sieves also help keep both your oil and your food quality high. As you fry, tiny bits of coating fall off and float around. If you leave them, they burn and give the oil a bitter taste, which then affects everything you cook. Skimming these bits out with a sieve now and then keeps the oil clean and the flavor bright.
Choosing the Best Oil for Deep Frying
Which Oils Work Best for Deep Frying and Why?
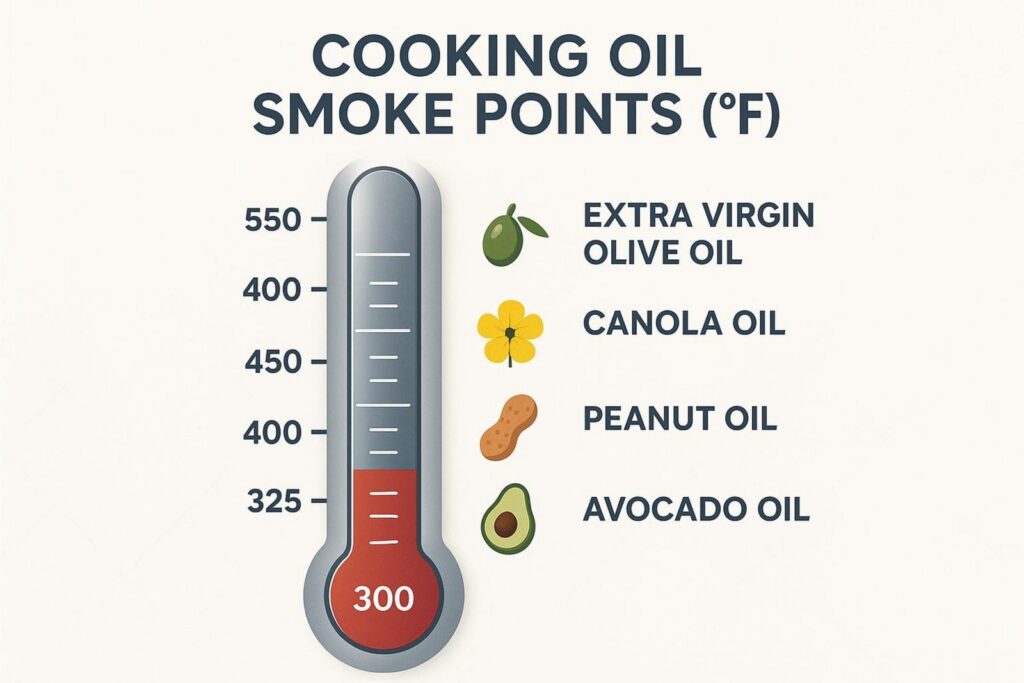
The best oils for deep frying have a high smoke point and a mild taste. Peanut oil is often praised because it can handle heat up to about 450°F and has a light, pleasant aroma that doesn’t overpower the food. If nut allergies are a concern, canola oil and vegetable oil blends are good, budget-friendly choices that stay stable at high heat and have a neutral flavor. Regardless of the oil you choose, implementing systems from Save Fry-Oil can help you extend fry-oil life, enhance food quality, and cut operating costs sustainably.
Refined oils are usually better for frying than unrefined ones. For example, extra virgin olive oil is great for salads, but its lower smoke point and strong flavor make it a poor pick for deep frying. Avocado oil has a high smoke point too, but it tends to cost more.
The goal is to choose an oil that stays steady at high heat and doesn’t break down into harsh smoke or harmful byproducts.
How Does Oil Smoke Point Affect Food Quality?
The smoke point is the temperature where oil starts to break down and smoke. Once oil reaches this stage, its taste and smell turn harsh, and food quickly picks up those bad flavors. Also, when oil smokes, it’s close to its flash point-the temperature where it can catch fire on its own.
Choosing an oil with a smoke point well above your frying temperature (usually 350°F to 375°F) gives you a safety zone. The oil stays a clean, steady heat source instead of burning and flavoring the food in a bad way. It also makes the oil last longer for reuse, since it hasn’t been pushed too hard the first time.
What Are the Health and Flavor Differences Between Oils?
Deep frying is rarely seen as a “light” way to cook, but your oil choice still affects how healthy the dish is. Oils high in monounsaturated fats, like peanut and avocado oil, tend to stay stable under heat better than oils with lots of polyunsaturated fats. More stable oils break down less and keep both taste and nutrition in better shape.
In terms of flavor, neutral oils let the main ingredients stand out. That’s why canola or grapeseed oil works well for delicate foods like fish or vegetables. Some traditional dishes, though, depend on specific fats for flavor. For example, classic Belgian fries are often cooked in beef tallow, which gives a rich, savory taste that most vegetable oils can’t match.
How to Store and Reuse Frying Oil Safely
Reusing oil is a great way to make deep frying more affordable. After you finish frying, let the oil cool fully in the pot. Once cool, pour it through a fine-mesh sieve lined with cheesecloth or a coffee filter into a clean glass jar. This removes tiny particles that would otherwise burn or go rancid next time.
Store the strained oil in a cool, dark place like a pantry or even the fridge. Heat, light, and air shorten an oil’s life. You can usually reuse oil three to five times, depending on what you cooked. Strong-smelling foods like fish will flavor the oil, so keep separate jars-for example, one for fish and one for everything else. If the oil turns dark, thick, or smells soapy or off, it’s time to throw it out.
Preparation Techniques for Consistent Deep Frying
Why Drying Ingredients Prevents Splatter
Water expands very fast when it turns to steam, which is exactly what happens when moisture hits 350°F oil. This sudden change causes oil to pop and spray. By thoroughly patting meat and vegetables dry with paper towels before coating them, you cut down this violent bubbling and make frying safer and cleaner.
Drying also helps the coating stick better. Flour and batter do not cling well to wet surfaces; they slide off and leave bare spots. A dry exterior lets starches grab on firmly, giving you an even, good-looking crust.
How to Create Effective Batters and Breading
A good coating crisps up on the outside while shielding the inside. For breading, the standard three-step method works best: dip in seasoned flour, then in egg wash, then in breadcrumbs (Panko is great for extra crunch). These layers form a strong crust that holds on during frying.
For batters like tempura or beer batter, cold ingredients are often the key. Using ice-cold water or beer and mixing the batter lightly helps avoid too much gluten, which can make the coating tough. This gives you a light, crisp shell instead of a heavy, bread-like one. Many cooks add some cornstarch or rice flour to make the crust even crispier and reduce oil soak-in.
What Is the Importance of Not Overcrowding the Fryer?
Overcrowding is one of the main reasons fried food turns out greasy. When you add a lot of room-temperature food at once, the oil temperature drops sharply. If it falls too low, the oil seeps into the food instead of quickly cooking the surface. The result is heavy, oily food instead of light, crunchy bites.
To avoid this, cook in smaller batches. This gives the oil time to bounce back to the right temperature between batches. It also keeps the pieces from sticking together. Patience pays off in deep frying; spending a few extra minutes on multiple rounds is far better than serving one big batch of soggy, unappealing food.
Managing Temperature for Crispier, Evenly Cooked Food
Ideal Temperature Range for Popular Fried Dishes
Most deep frying works best between 350°F and 375°F (175°C to 190°C). In this window, the outside browns at about the same rate the inside cooks. Some foods, though, need a slight change. Thick cuts like bone-in chicken thighs often do better at around 325°F so the meat cooks through before the skin burns.
Thin or small items like shoestring fries or small shrimp can handle higher heat, around 375°F, for a quick, crisp finish. Learning these small differences helps you adjust your burner for each food, leading to consistent results.
How Oil Temperature Influences Absorption and Browning
The science of deep frying is a balance between steam pressure and oil. As food cooks, its moisture turns to steam and pushes outward, helping keep the oil from soaking in. If the oil isn’t hot enough, the steam pressure stays weak, and oil slips into the food.
Browning (the Maillard reaction) also depends on temperature. Below about 300°F, browning is slow. Once you get into the 350°F+ zone, surface sugars and proteins react quickly, creating the flavors we think of as “fried.” If the oil is too hot-over 400°F-these reactions race ahead and the food can burn, tasting bitter and charred instead of pleasantly toasted.
How to Prevent Sudden Drops in Frying Temperature
To avoid big drops in temperature, pay attention to recovery time. After you remove a batch, wait until the thermometer climbs back to your target temperature before adding more food. It’s tempting to rush, but those extra minutes are what separate a crisp batch from a limp one.
You can also help by bringing ingredients closer to room temperature before frying. Putting fridge-cold chicken straight into the oil is like dropping an ice cube into hot coffee-it cools everything down fast. Letting food lose some of its chill reduces this effect and helps keep the oil temperature steady.
Key Tips for Better Flavor and Texture
How to Season Food as Soon as It Leaves the Oil
The best time to season fried food is within the first 30 seconds after it comes out of the oil. While the surface is still shiny with hot oil, salt and spices stick very well. Once that oil cools or drains off, seasoning tends to slide off and collect on the plate instead.
Keep a small bowl of fine salt or your favorite spice mix right next to your draining area. As soon as the food hits the wire rack, sprinkle it generously. This helps the seasoning cling to the crust so every bite has good flavor. For an extra pop, you can use finishing salts or a little citrus zest on fried seafood.
Why Resting Fried Food Improves Crunch
It may seem odd, but letting fried food rest for two to three minutes actually makes it crispier. Right out of the oil, the crust can still be slightly soft because steam is still moving outward. A short rest on a wire rack lets the last bits of moisture escape and the crust firm up completely.
Resting also helps meat juices settle back inside foods like fried chicken or pork. If you cut into them right away, juices run out, which can soften the bottom crust. A brief wait keeps the meat moist while preserving a crunchy shell.
Safety Practices to Prevent Accidents and Burns
How to Avoid Oil Spills and Kitchen Fires
The most important safety rule in deep frying is to never fill the pot more than halfway with oil. When you add food, the oil rises and bubbles. If the pot is too full, the oil can spill over the sides and catch fire on the burner. This type of boil-over is behind many grease fires.
Always choose a pot that is taller than the level of oil you plan to use. Also, keep a lid that fits the pot close by. If the oil ever catches fire, the safest way to put it out is to slide the lid on to cut off the oxygen. Never throw water on a grease fire; the water sinks, turns to steam, and blasts burning oil outward, causing a huge flare-up.
Best Ways to Store and Dispose of Used Oil
When your oil is no longer usable, you need to throw it away correctly. Never pour used cooking oil down the sink. Even if you chase it with hot water, it will cool, solidify, and clog your pipes or add to big grease blockages in city sewers.
Instead, let the oil cool, then pour it into a non-recyclable container, like an old milk carton or a plastic jar with a lid, and put it in the regular trash. Many towns also have drop-off spots that accept used cooking oil and turn it into biodiesel. This is a more eco-friendly option if you have a lot of oil left after a big frying session.
Essential Fire Safety Tips for Frying
Besides keeping a lid nearby, having a Class K or Class B fire extinguisher in your kitchen is wise. Class K models are made for vegetable oil and animal fat fires, which makes them especially good for frequent fryers. Learn how to use it before anything happens-remember the PASS steps: Pull, Aim, Squeeze, Sweep.
Also, never leave hot oil alone on the stove. Oil can go from the right temperature to smoking and unsafe in just a few minutes if the heat stays high. If you must step away, turn off the burner first. The oil will stay hot for a while because of its heat mass, but shutting off the flame is the only way to keep things safe while you’re gone.
While mastering deep frying usually focuses on the cooking steps, serious fans also think about long-term kitchen efficiency. For example, you can make your frying oil last up to 50% longer by using special filtration powders or disks that remove extremely fine impurities. These products, common in restaurant kitchens, are now easier for home cooks to buy.
Also, plan your frying in a “light to strong” order: start with mild foods like vegetables or doughnuts, and save bold items like spicy chicken or fish for the end to avoid flavor carry-over. Treating your oil like an important ingredient instead of a throwaway item helps you save money and build a more efficient, flavor-focused, and less wasteful kitchen.